On Windows 10, when connecting a removable storage device or an internal hard drive, the system detects and assigns a drive letter automatically to make it usable. However, when reconnecting an external drive (such as a USB flash drive or SD or microSD cards), the system can end up assigning a different letter, which can be annoying.
If you want to see the same drive letter on a particular device, you can manually assign a permanent letter to any drive connected to your computer, and on Windows 10, you can do this in at least three different ways, using Disk Management, Command Prompt, or PowerShell.
Using this approach will prevent Windows 10 from assigning a new letter or trying to set a letter already in use, which can cause conflicts. Also, it helps to select a drive letter that makes more sense to you.
In this Windows 10 guide, we walk you through several methods to manually assign a permanent letter to a drive, as long as you're connecting the drive to the same device and the letter isn't already in use.
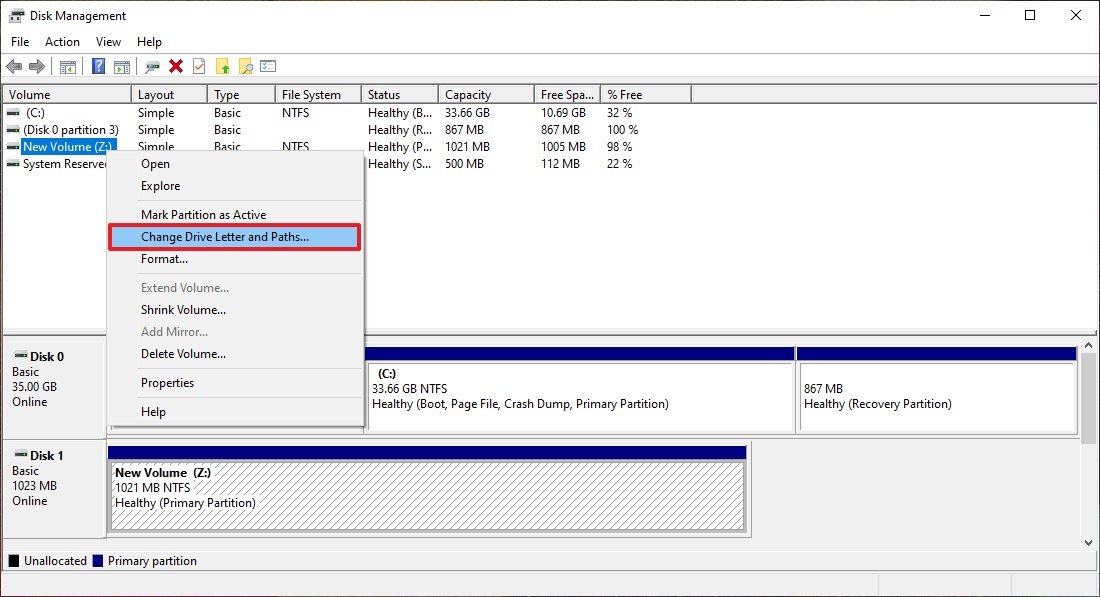
How to assign a drive letter using Disk ManagementTo manage drive letters with the Disk Management tool, use these steps:
Right-click the drive and select the Change Drive Letter and Paths option.


Click the Change button.


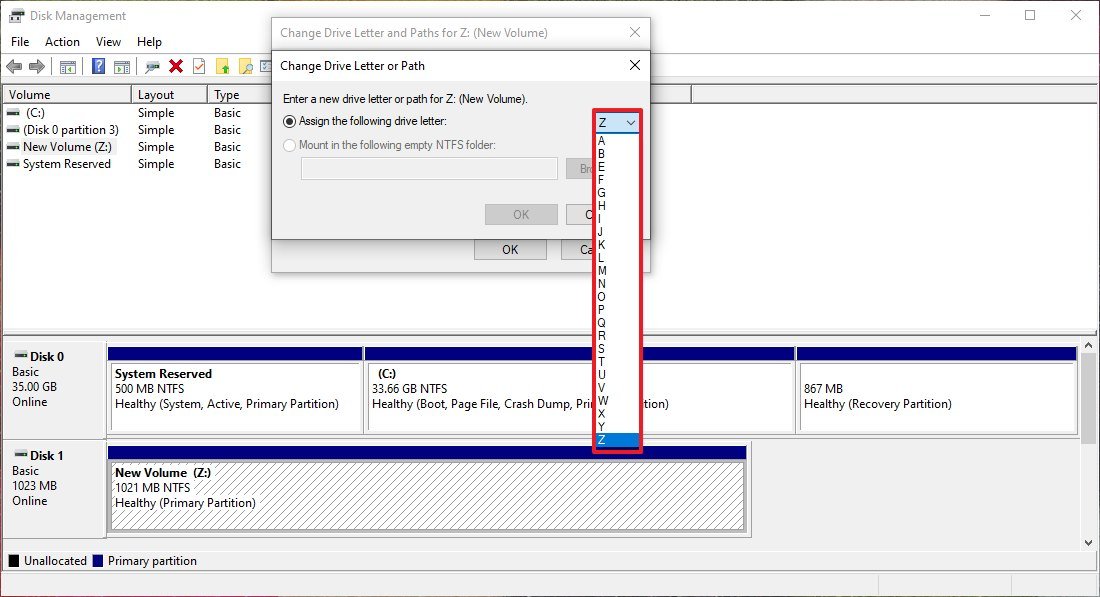
Use the drop-down menu to assign a new drive letter.


Quick tip: To avoid the system trying to assign the same letter to another drive, it's a good idea to start adding letters in backward order. For instance, instead of using D, E or F, it better to start with Z, Y or X when assigning a new letter.
Once you complete these steps, the drive will permanently retain the assigned letter, even after reconnecting it. However, if you connect the drive to another device, it may receive a different letter.
How to assign a drive letter using Command PromptWhile the easiest way to assign a new drive letter is to use Disk Management, you can also use DiskPart in Command Prompt to perform the same task.
To assign a drive letter using Command Prompt, use these steps:
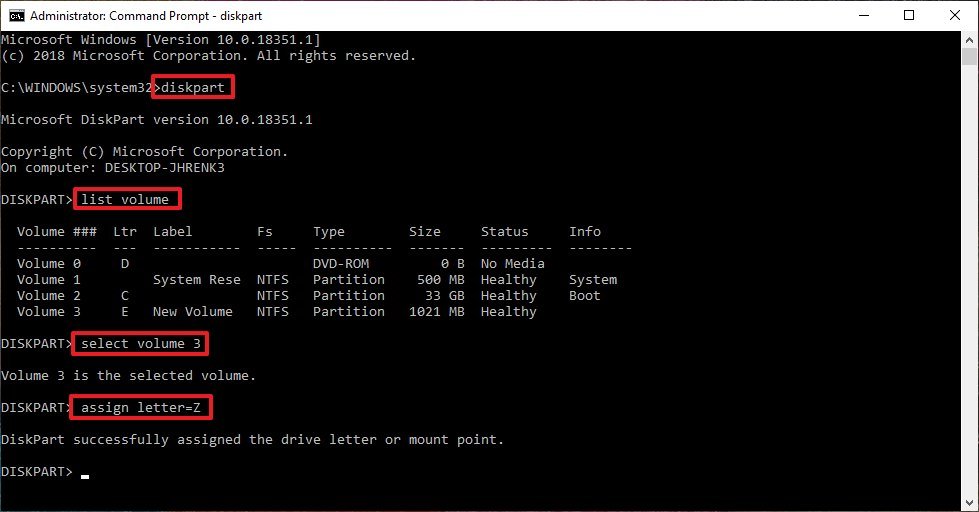
Type the following command to start DiskPart and press Enter:
diskpart
Type the following command to list all the available volumes and press Enter:
list volume
Type the following command to select the volume (drive) to assign a new letter and press Enter:
select volume 3
In the command, make sure to change "3" to the number that represents the drive on your device.
Type the following command to assign a new drive letter, and press Enter:
assign letter=Z


The command assigns the letter "Z" to the drive assuming it's available. However, you need to make sure to change the letter for the one that you want to use.
After completing these steps, similar to Disk Management, every time you reconnect the storage to the same device, Windows 10 should assign the same letter automatically.
How to assign a drive letter using PowerShellAlternatively, you can also use PowerShell to change a drive letter on Windows 10 using these steps:
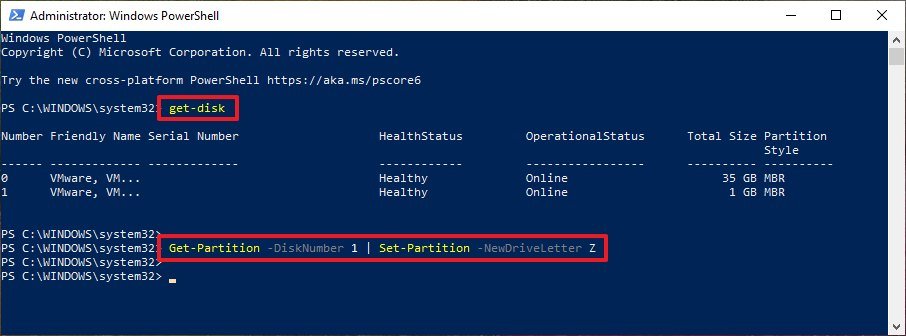
Type the following command to list the available drives and press Enter:
Get-Disk
Type the following command to assign a permanent letter to the drive and press Enter:
Get-Partition -DiskNumber 1 | Set-Partition -NewDriveLetter Z


In the command, make sure to change "1" to the number that represents the drive that you want to modify, and change "Z" for the new letter that you want to use.
Once you complete the steps, the drive will be accessible through File Explorer using the letter that you assigned, and Windows 10 won't try to change it.
Updated March 7, 2019: We revised this guide to make sure it's current with the latest version of Windows 10.
More Windows 10 resourcesFor more helpful articles, coverage, and answers to common questions about Windows 10, visit the following resources:

0 comentários:
Postar um comentário